JDK21 + Spring Boot 4.x 版轻论坛系统在服务器上部署
演示主机操作系统为Debian 13.3 64位,JDK版本为21,MySQL版本为8.4。
安装OpenJDK 21
在终端中输入命令。
					sudo apt update
					sudo apt install openjdk-21-jdk
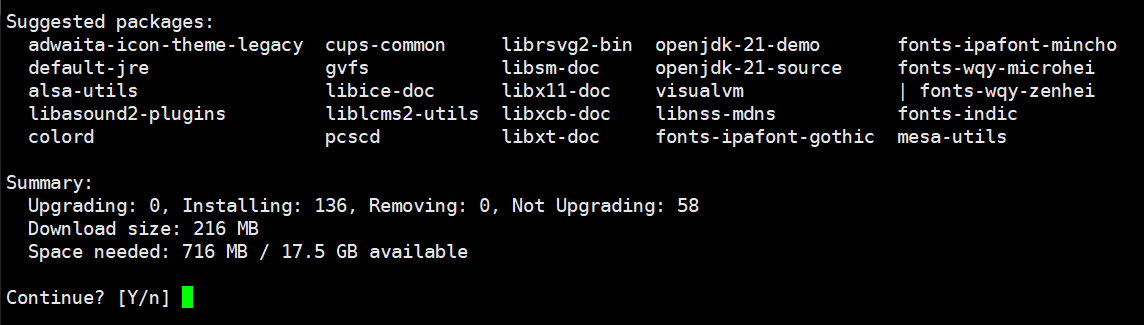
在终端中输入 y 后回车,安装完成后在终端中输入 java -version 命令来验证是否安装成功。

安装Redis【可选】
在终端中输入命令。
					sudo apt update
					sudo apt install redis-server
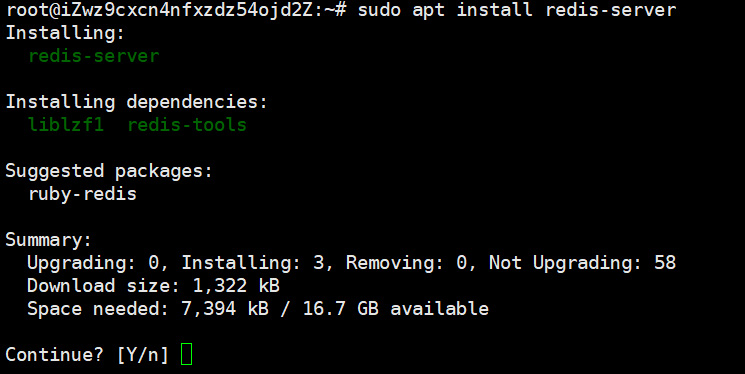
在终端中输入 y 后回车,安装完成后在终端中输入 redis-server -v 命令来验证是否安装成功。

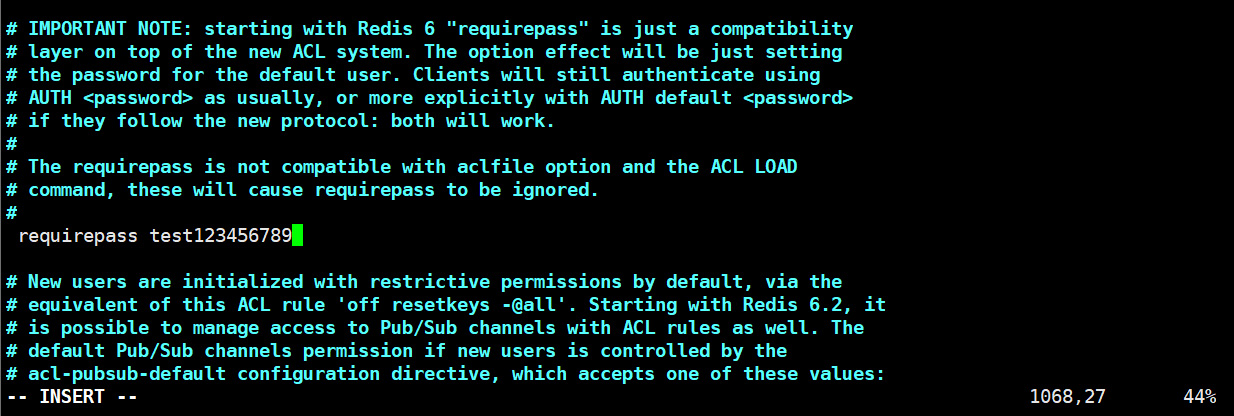
默认情况下,Redis 只允许本地访问且没有密码。为了增加安全性,需要修改配置文件设置密码,找到 # requirepass foobared,去掉注释并改为你的密码:requirepass test123456789
sudo vim /etc/redis/redis.conf
| 管理Redis服务 | |
|---|---|
| sudo systemctl enable redis-server | 配置开机启动 |
| sudo systemctl start redis-server | 启动 |
| sudo systemctl stop redis-server | 停止 |
| sudo systemctl restart redis-server | 重启 |
| sudo systemctl disable redis-server | 删除开机启动 |
| sudo systemctl status redis-server | 查看启动状态 |
| sudo systemctl daemon-reload | 刷新 |
安装Nginx
使用包管理器安装
sudo apt install -y nginx
验证安装版本
nginx -v
测试配置文件是否正确
sudo nginx -t
主配置文件:/etc/nginx/nginx.conf
默认站点目录:/var/www/html/
共享资源目录:/usr/share/nginx/
访问日志:/var/log/nginx/access.log
错误日志:/var/log/nginx/error.log
| 管理Nginx服务 | |
|---|---|
| sudo systemctl enable nginx | 配置开机启动 |
| sudo systemctl start nginx | 启动 |
| sudo systemctl stop nginx | 停止 |
| sudo systemctl restart nginx | 重启 |
| sudo systemctl disable nginx | 删除开机启动 |
| sudo systemctl status nginx | 查看启动状态 |
| sudo systemctl daemon-reload | 刷新 |
安装MySQL 8.4
下载配置工具
wget https://repo.mysql.com/mysql-apt-config_0.8.36-1_all.deb
安装缺少的依赖工具
					sudo apt update
					sudo apt install -y gnupg lsb-release
安装配置包
sudo dpkg -i mysql-apt-config_0.8.36-1_all.deb
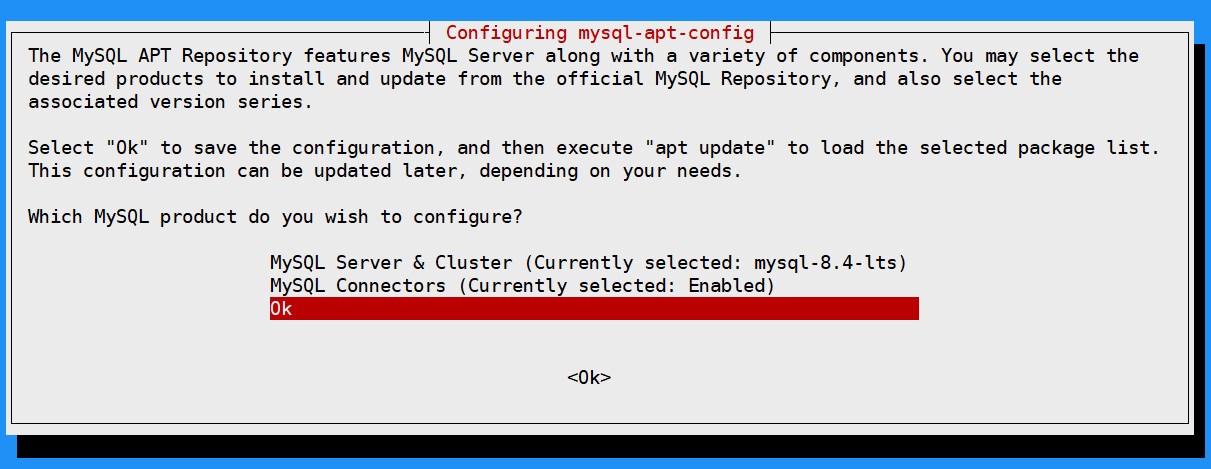
在弹出的蓝色背景页上按以下步骤操作:
1、在弹出的菜单中选择第一项:MySQL Server & Cluster
2、选择 mysql-8.4-lts
3、选择最下方的 Ok 完成配置
执行安装
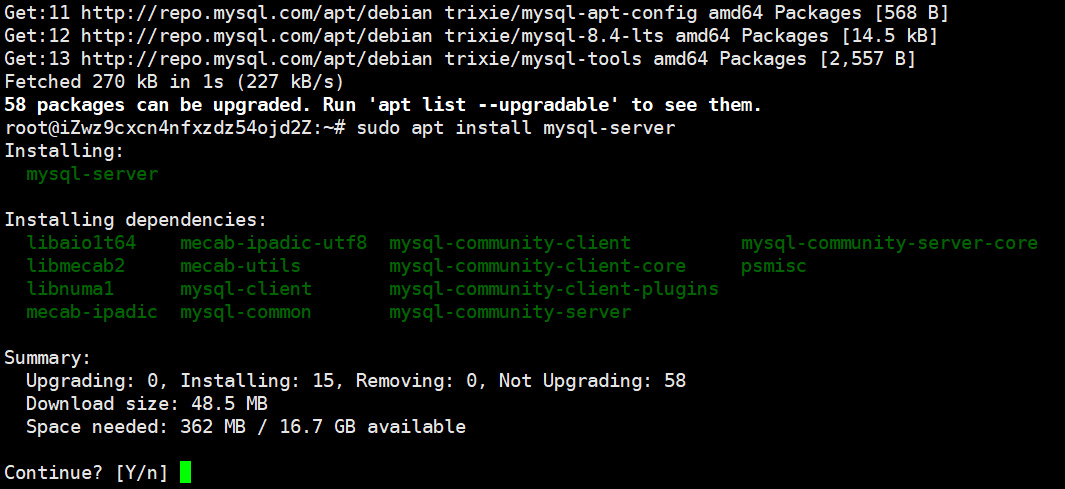
					sudo apt update
					sudo apt install mysql-server
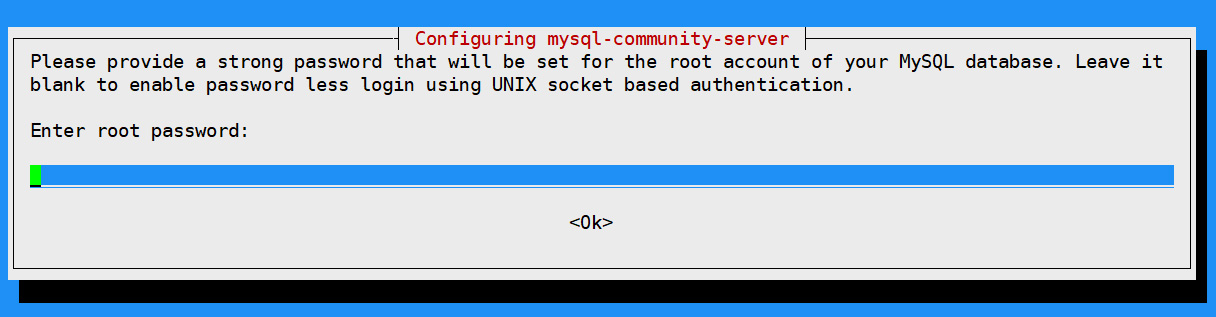
在终端中输入 y 后回车,然后在弹出的窗口中设置MySQL密码。
到这里MySQL安装完成。
登录数据库
mysql -u root -p
创建数据库语句参考
CREATE DATABASE `数据库名称` DEFAULT CHARACTER SET utf8mb4 COLLATE utf8mb4_general_ci;
| 管理MySQL服务 | |
|---|---|
| sudo systemctl enable mysql | 配置开机启动 |
| sudo systemctl start mysql | 启动 |
| sudo systemctl stop mysql | 停止 |
| sudo systemctl restart mysql | 重启 |
| sudo systemctl disable mysql | 删除开机启动 |
| sudo systemctl status mysql | 查看启动状态 |
| sudo systemctl daemon-reload | 刷新 |
编译轻论坛源代码
修改配置文件application.yml
修改allowInstallSystem的值为true (true表示使用图形界面安装)修改url: 数据库地址和名称
修改username: 数据库账号
修改password: 数据库密码
如需加密数据库的账号密码等信息,可以设置jasypt.encryptor.password的加密盐值,然后加密的信息用ENC()包裹。
例如字符 root 加密后变为 Sku969l49yh/xvRfuHQh8A== 填写到数据库账号处为 ENC(Sku969l49yh/xvRfuHQh8A==)
加密字符可以用 src/test/java/ 目录的 cms.Init.java 类 createEncryptionDatabaseParameter() 方法进行生成
bbs:
#是否允许显示图形界面安装系统
allowInstallSystem: true
# 跨域允许的域名,多个域名用英文逗号分割。如果nginx已配置了跨域参数,则本参数不需要配置。示例:http://localhost:3000,http://127.0.0.1:3000
#allowedOrigins: http://localhost:3000,http://127.0.0.1:3000,http://192.168.0.2:3000,http://192.168.0.2:8085,http://127.0.0.1:3001
...
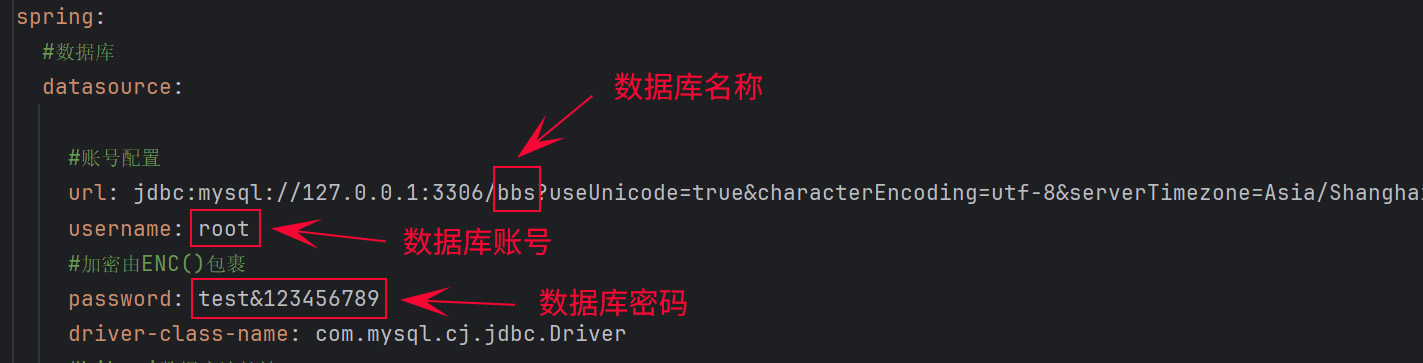
spring:
#数据库
datasource:
#账号配置
url: jdbc:mysql://127.0.0.1:3306/bbs?useUnicode=true&characterEncoding=utf-8&serverTimezone=Asia/Shanghai&zeroDateTimeBehavior=CONVERT_TO_NULL&allowPublicKeyRetrieval=true&useSSL=false&rewriteBatchedStatements=true
username: root
#加密由ENC()包裹
password: ENC(H8RxvgIzAJRfwLV10qFukA==)
...
#Redis配置
data:
redis:
database: 0 # 默认情况下有16个分片,这里配置具体使用的分片,默认是0
host: 127.0.0.1 # 服务器地址
port: 6379 # 服务器连接端口
password: test123456789 # 连接密码(默认为空)
...
cache:
# 缓存类型 jcache、redis、none(不使用缓存)
type: redis
...
#内嵌服务器配置
server:
#服务端口
port: 8080
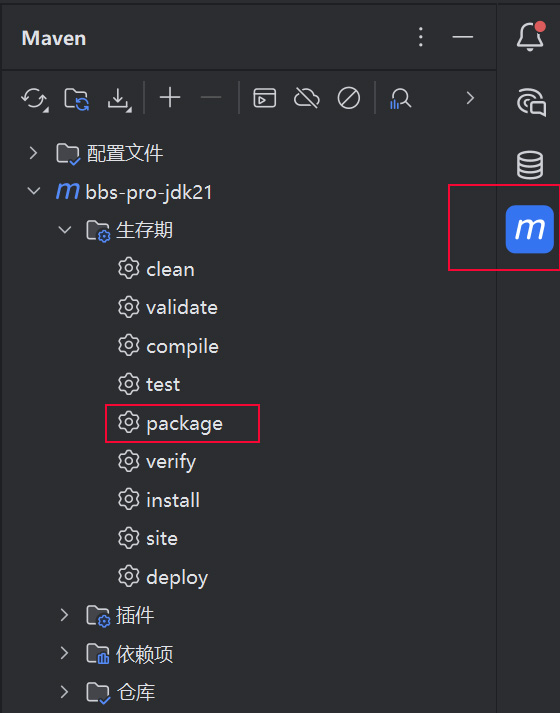
IDEA编译源代码
IDEA选中论坛项目 --> 点击右上角‘Maven’按钮 --> Lifecycle --> 双击package 将项目打成Jar包。
部署轻论坛
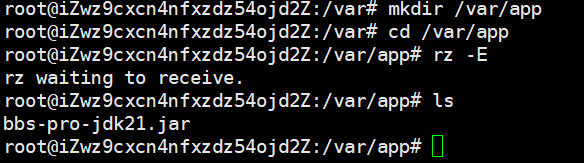
1、将编译好的论坛Jar包上传到服务器
					 mkdir /var/app   #创建目录
					 cd /var/app   #切换到安装目录
将打包好的论坛jar包上传到/var/app目录,注意将jar包重命名为bbs-pro-jdk21.jar(要和bbs.service文件配置的路径对应)
2、创建tomcat启动用户并授权
					 sudo groupadd tomcat  #创建一个名为 tomcat 的组
					 sudo useradd -s /bin/false -g tomcat -d /opt/tomcat tomcat  #创建 tomcat 用户,并将用户添加到 tomcat 组中,以 /opt/tomcat 作为主目录
3、更改文件权限
chown -R tomcat:tomcat /var/app
4、配置开机启动脚本
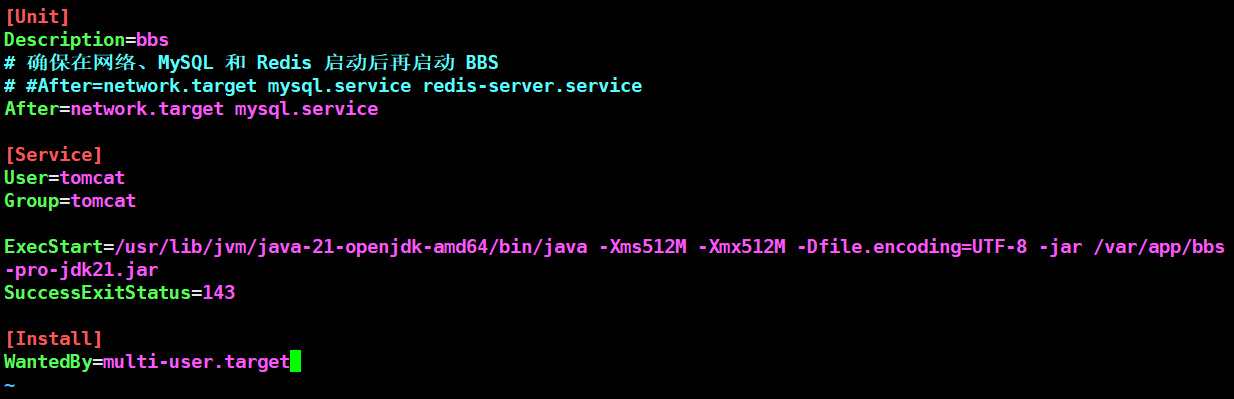
在/usr/lib/systemd/system目录下增加bbs.service,目录必须是绝对目录
vim /usr/lib/systemd/system/bbs.service
将下面的配置内容复制到bbs.service文件中。/usr/lib/jvm/java-21-openjdk-amd64/bin/java为jdk的安装路径 /var/app/bbs-pro-jdk21.jar为jar包文件的绝对路径。
-Xms 设置虚拟机可用内存堆的初始大小。-Xms512M表示虚拟机启动时分配的内存大小为512M
-Xmx 设置虚拟机的最大可用大小。-Xmx512M表示虚拟机能使用最大内存为512M
请根据服务器的实际情况配置,本次演示将设置为-Xms512M -Xmx512M,服务器内存充足时请将这两个参数设置为比较大的值;其它调优参数请参考网上相关资料
						[Unit]
						Description=bbs
						# 确保在网络、MySQL 和 Redis 启动后再启动 BBS
						#After=network.target mysql.service redis-server.service
						After=network.target mysql.service

						[Service]
						User=tomcat
						Group=tomcat

						ExecStart=/usr/lib/jvm/java-21-openjdk-amd64/bin/java -Xms512M -Xmx512M -Dfile.encoding=UTF-8 -jar /var/app/bbs-pro-jdk21.jar
						SuccessExitStatus=143

						[Install]
						WantedBy=multi-user.target
保存配置文件后执行systemctl daemon-reload命令刷新
sudo systemctl daemon-reload
| 管理BBS服务 | |
|---|---|
| sudo systemctl enable bbs | 配置开机启动 |
| sudo systemctl start bbs | 启动 |
| sudo systemctl stop bbs | 停止 |
| sudo systemctl restart bbs | 重启 |
| sudo systemctl disable bbs | 删除开机启动 |
| sudo systemctl status bbs | 查看启动状态 |
| sudo systemctl daemon-reload | 刷新 |
5、安装轻论坛
打开浏览器访问 http://您的地址:8080/install 执行安装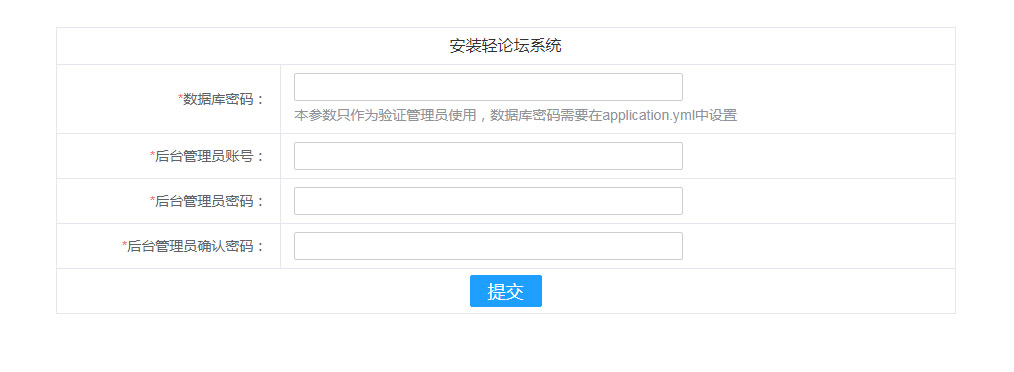
6、重启jar包应用服务
安装完成后需重启jar包应用服务才能正常运行
sudo systemctl restart bbs
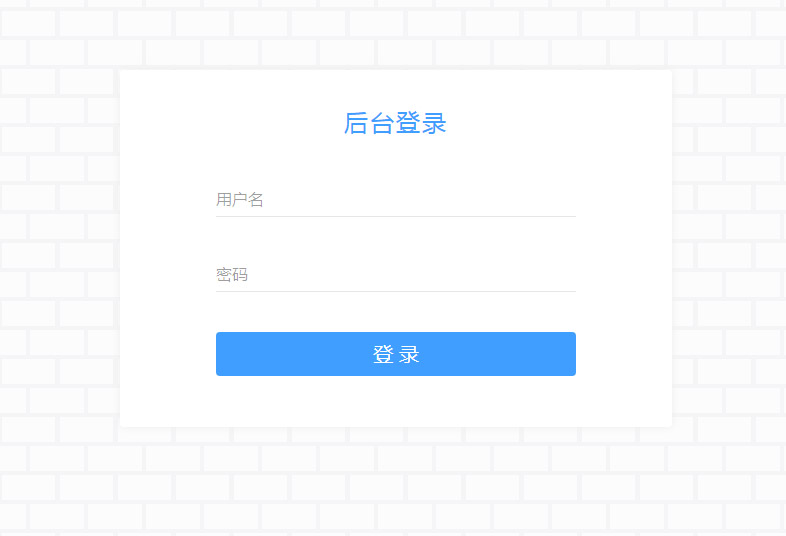
7、进入轻论坛管理后台
需部署前端后打开浏览器访问 http://您的前端地址/admin/login 进入轻论坛管理后台登录页面